I want to share with you today one of the most interesting recipe I made lately.
I bought a new Mini Cheesecake pan recently and I was eager to try it. We just love cheesecakes, our favourite is the strawberry so far, but we don’t want to stop here, (well, I don’t want to, because my husband would be happy to stuck with it forever), and I’m always looking for new flavours and tastes to try. Funny thing though, I haven’t posted any of my strawberry cheesecakes yet, something that will need to be fixed in the near future for sure.
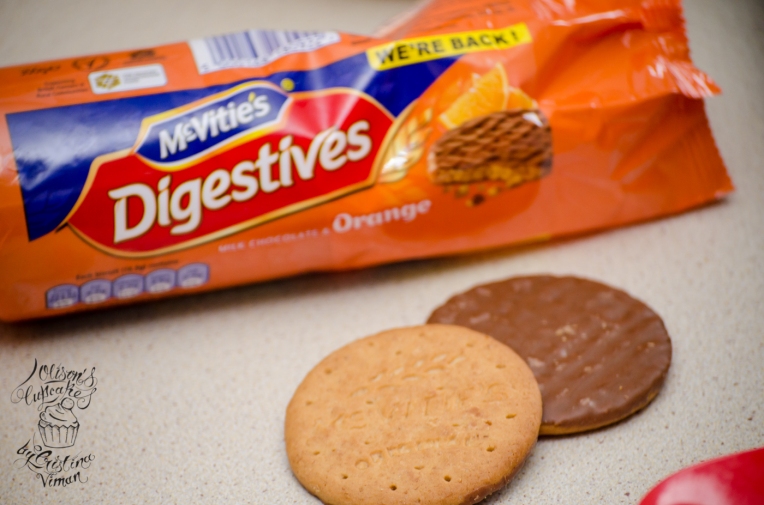
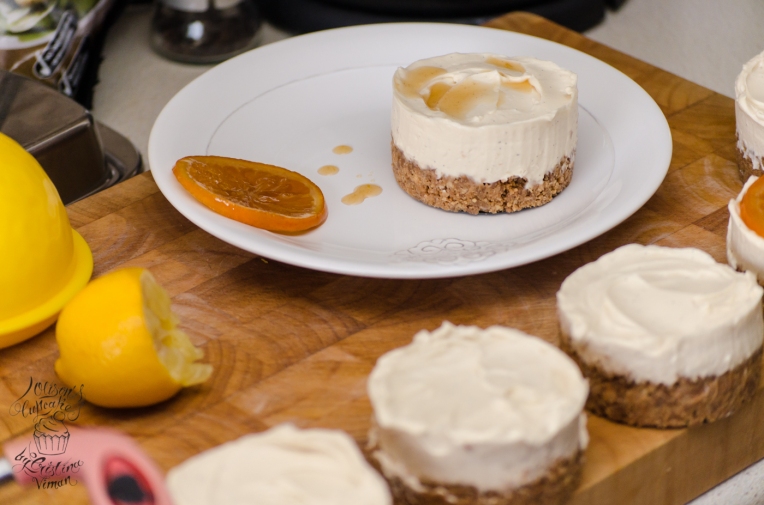
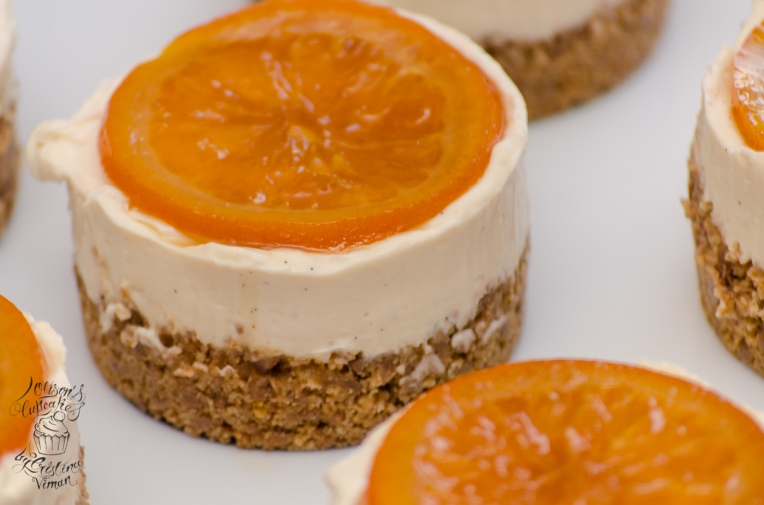
Anyways, this time I chose to make Orange Cheesecakes, and the idea came when I saw a pack of Orange and Chocolate flavour Mcvitie’s Digestive biscuits at the supermarket, the ones that have one side coated with chocolate.
Turns out, it was a very good choice! The chocolate-orange biscuits as a base for this cheesecake added an extra richness and complimented the topping perfectly!
Ingredients:
-400 gr Orange-Chocolate digestives biscuits
-100 gr melted butter
-750 gr (3 pack) Mascarpone soft cheese
-2 tsp vanilla essence or 1 vanilla pod
-100 gr icing sugar
-300 ml double cream
-lemon zest (optional)
-a few small to medium size oranges
-1 cup brown sugar
-3/4 cup water
-fresh lemon juice
Method:
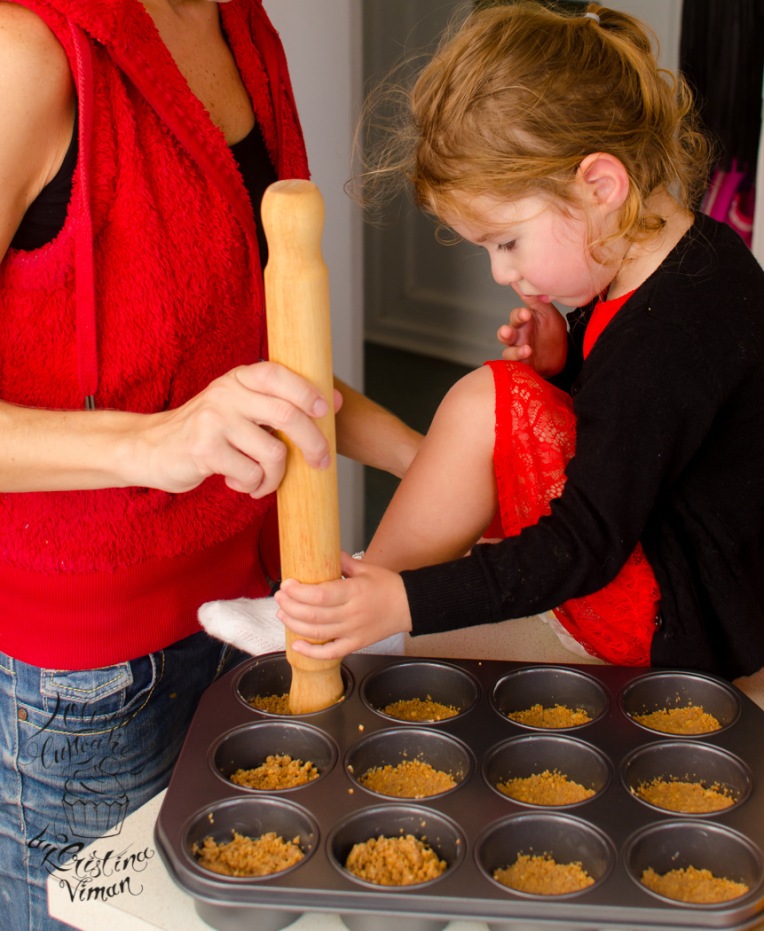
1. Butter the mini cheesecake pan in every hole.
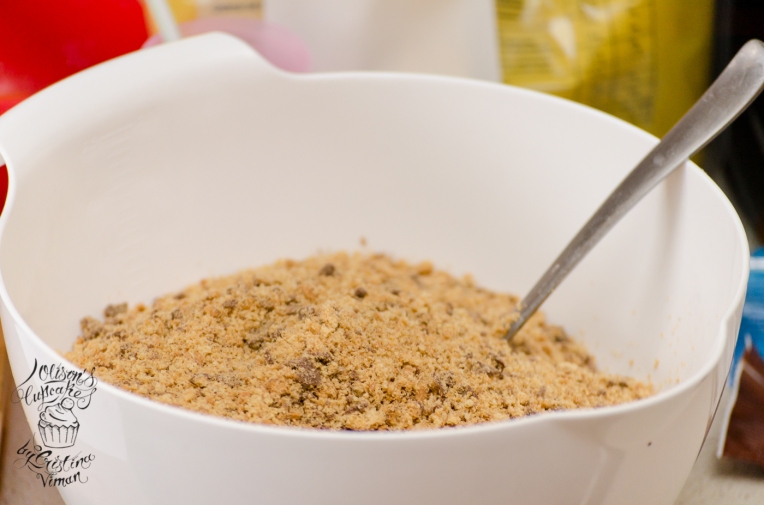
2. Put the biscuits in a food processor or plastic food bag and crush to crumbs using a rolling pin. Transfer the crumbs to a bowl, then pour over the melted butter. Can be melted in the microwave.
Mix thoroughly until the crumbs are completely coated. Spoon them into the prepared tin and press firmly down into the base to create an even layer. To do this I used the edge of my rolling pin. Chill in the fridge for about 1 hour to set firmly.
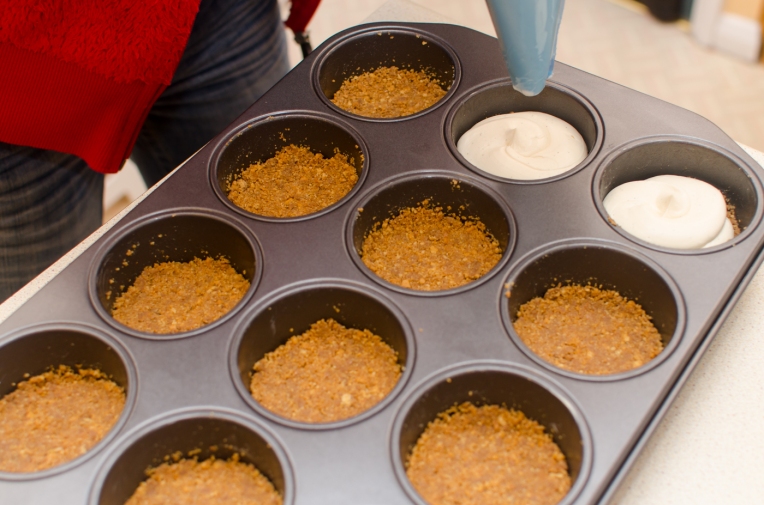
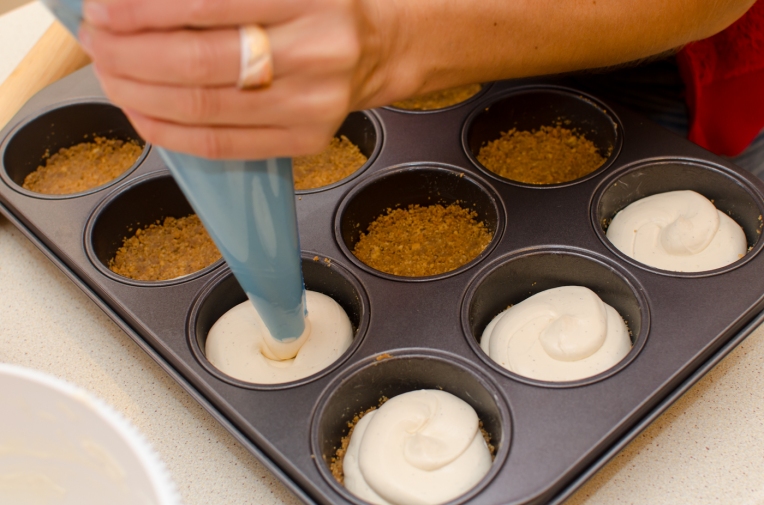
3. Make the filling by mixing the cream cheese and vanilla and sugar, then using an electric mixer add the double cream and beat until is completely combined.
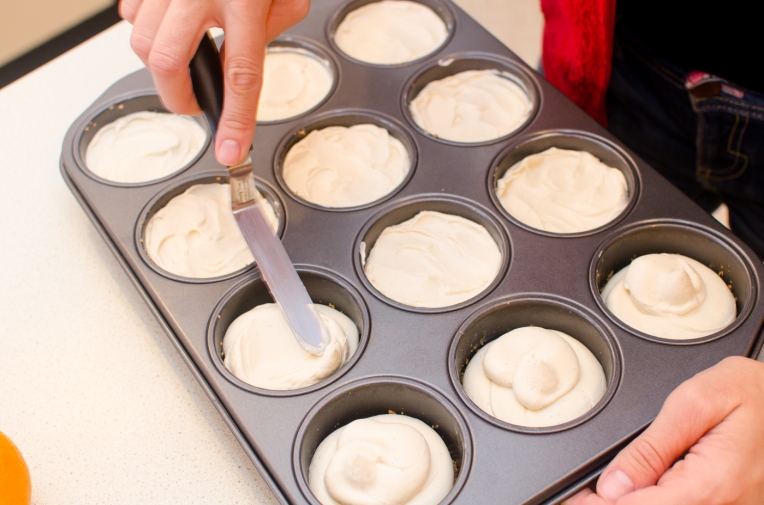
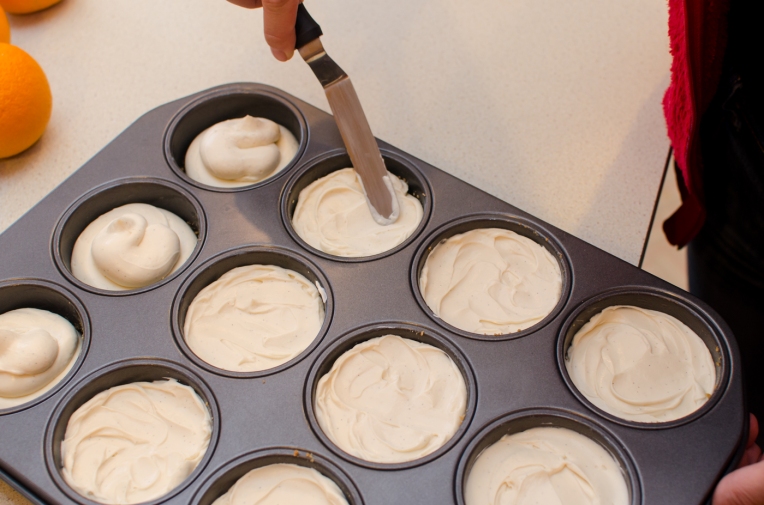
4. Scoop the cream mixture on top of the biscuit base. I used a piping bag to do this.
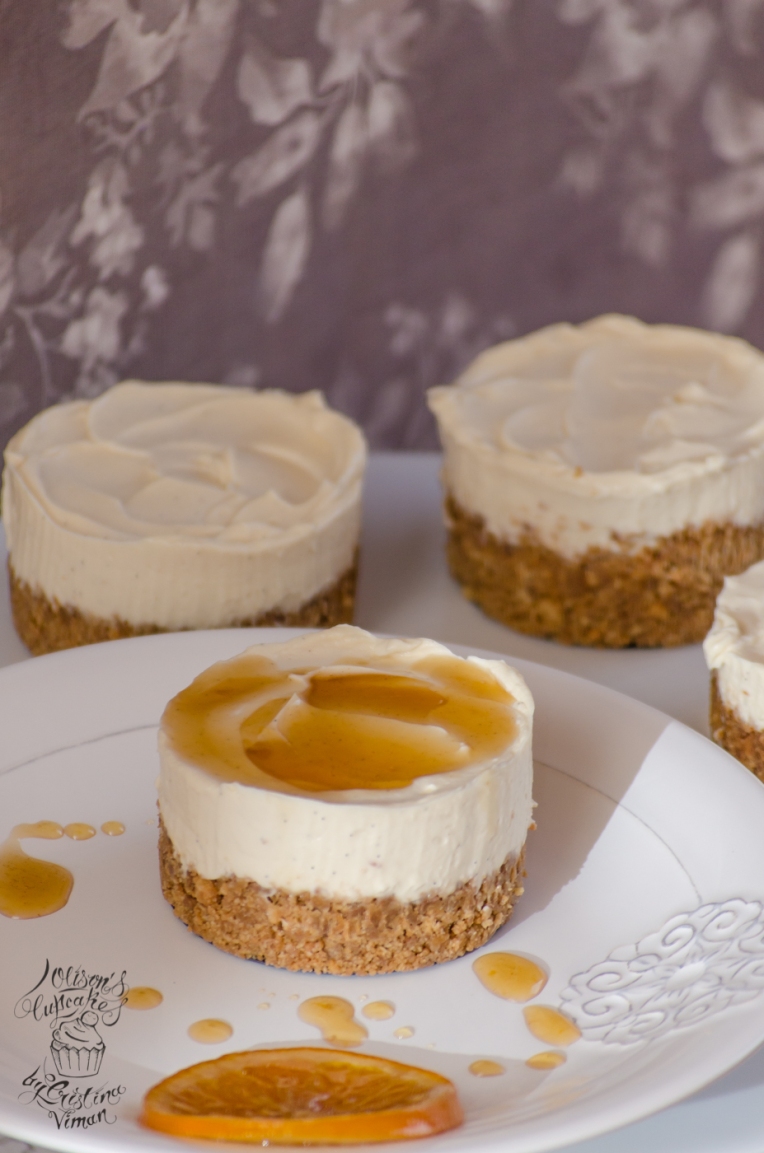
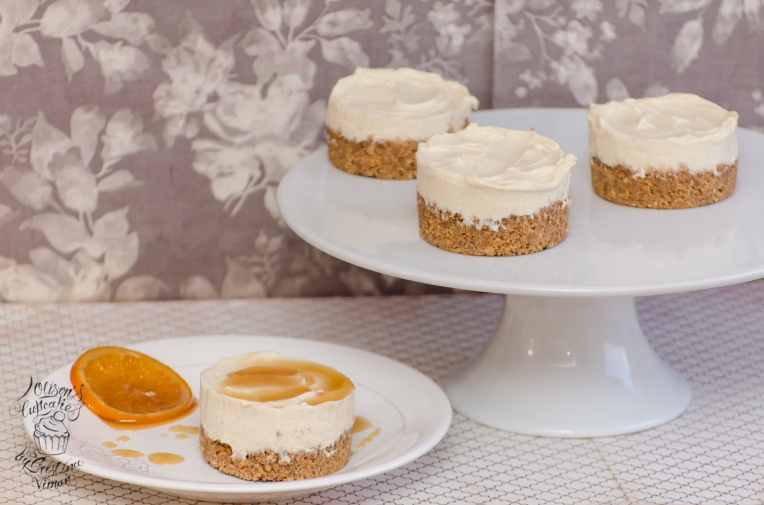
Now, smooth the top of the cheesecakes down with the back of a dessert spoon or a spatula. Leave to set in the fridge overnight.
5. Next day, or about 1 hour before serving the cheesecakes, make the topping, and also remove the cheesecakes from the fridge to adjust to room temperature.
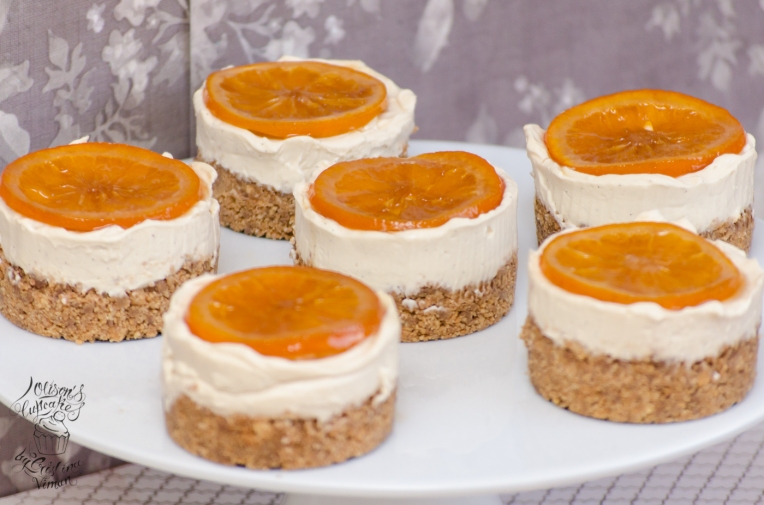
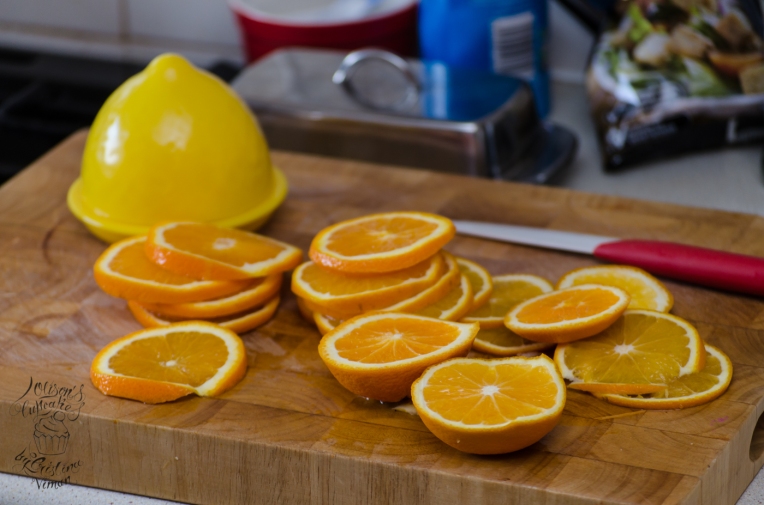
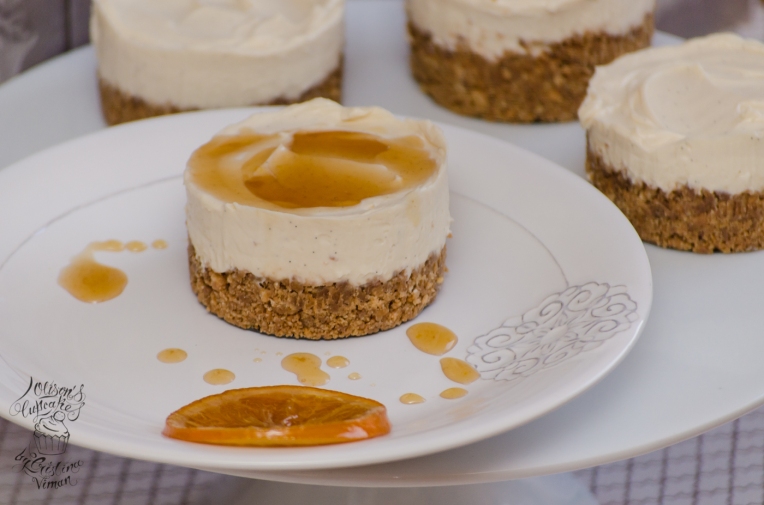
With a sharp knife, slice orange into thin rounds , discarding the seeds.
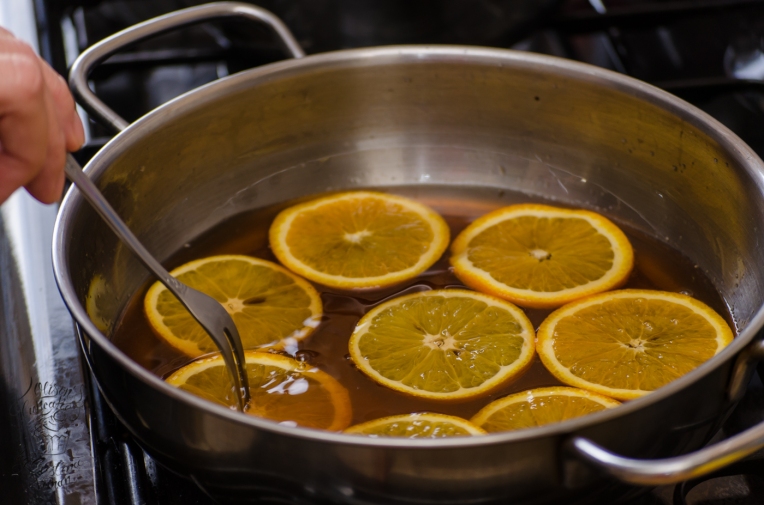
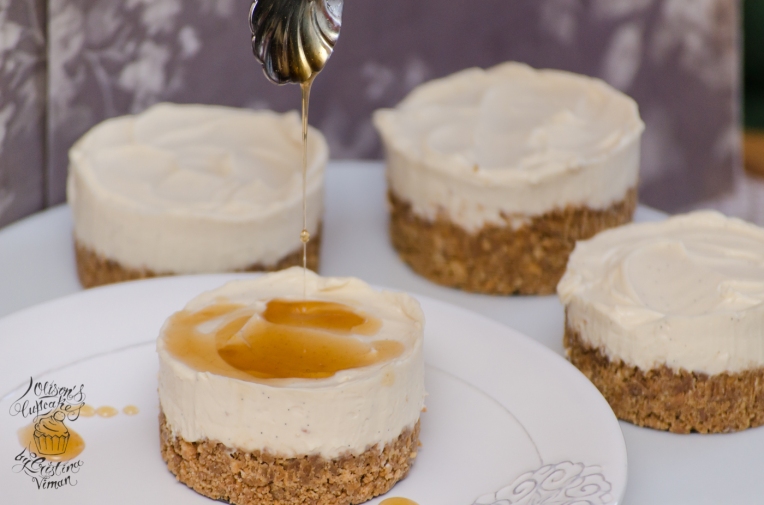
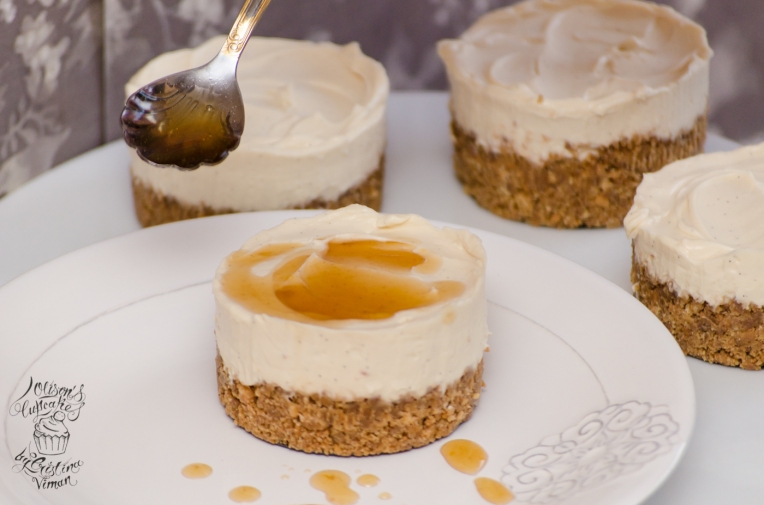
In a deep frying pan or pot over medium-high heat, stir sugar, 3/4 cup water, and lemon juice until sugar is dissolved. Add orange slices and bring to a simmer. Cover and simmer 5 minutes. Uncover and simmer gently, keeping slices in a single layer and turning occasionally, until they’re slightly candied and translucent and liquid has consistency of a thin syrup (about 20 minutes), there should be about 1/2 cup liquid in pan. Let it cool in the pan. Cover and chill at least 15 minutes.
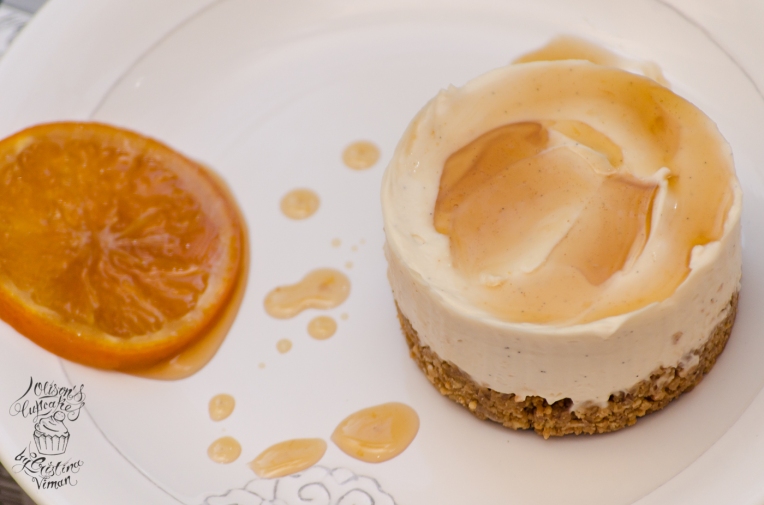
6. Place an orange slice on top of each individual cheesecake and drizzle some syrup on top as well. Alternatively, just drizzle the orange syrup on top of the cake and place a slice of orange next to it.