Best Carrot Cake Ever!

Hands down, I just found THE best carrot cake recipe there is to find! I have tried many recipes so far, and this one has to be the queen of all. It so happened that I took a brake from eating for a week and I was only drinking fruit and vegetable juices, and to keep myself away from food I was watching cooking channels on YouTube. And it worked! Plus, I came across some delicious new recipes .and that’s how I found https://divascancook.com/easy-moist-carrot-cake-recipe/.

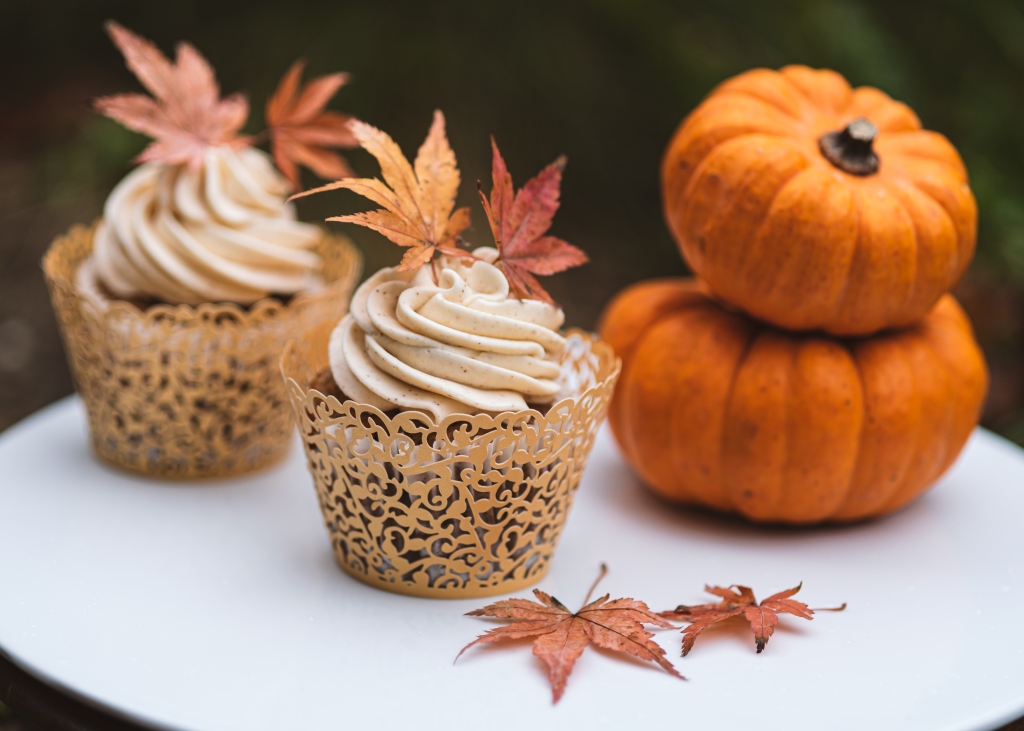
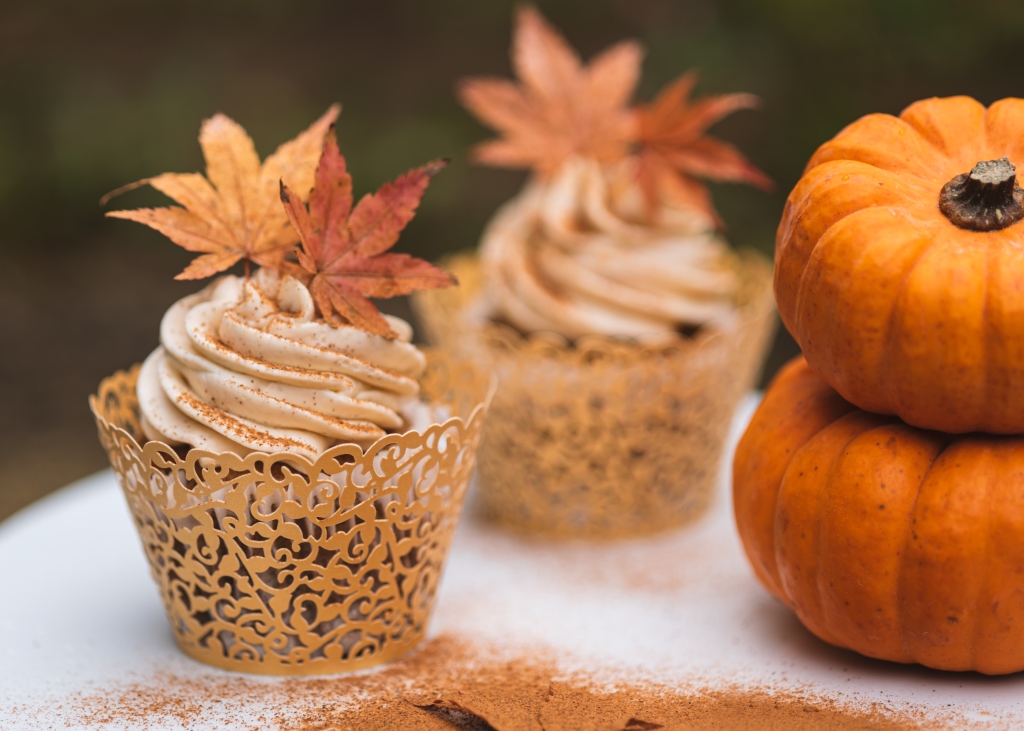
I followed the recipe for the cake and I baked cupcakes, but I decided to make my favourite Cinnamon Cream Cheese frosting, because I simply don’t like buttercream, and my Cream Cheese is absolutely soft, light and pure heaven. The other thing I changed is that I added about 100 g toasted pecans to the batter.

Ingredients for the frosting of you decide to follow me:

600 ml double cream

250 g Mascarpone Cream Cheese

Icing sugar (to taste)

Ground cinnamon (to taste, you go with 1 tsp at forst, then add more if you want it stronger)

Pinch of salt

Method:

Whip the Mascarpone in a large bowl using an electric mixer and gradually add the double cream and sugar, salt and cinnamon. Mix until you get a nice velvety piping consistency, but don’t over mix it. You don;t want a hard and stiff forsting.

White Chocolate Chips Cupcakes With Strawberry Cream Cheese

DSC_1294-Edit


White chocolate and strawberries are a match made in Heaven! Honestly. Add some cream cheese to it and you want to eat them all at once. We did…..


DSC_1310-Edit


I made a light basic vanilla cupcake batch with added white chocolate chips. I love to use my vanilla cake recipe because you can add whatever flavor to it before baking. It could be chocolate chips or fresh fruits or different extracts instead of vanilla.


DSC_5703


DSC_1293-Edit


To make the frosting for this recipe, first I reduced 250 g of fresh strawberries to a puree, meaning that I cooked the strawberries on the stove without sugar for about 30-35 minutes stirring continuously until the water evaporated and I was left with a concentrated strawberry puree. This way you get rid of all the excess liquid from the fruit and you are left with concentrated strawberry flavor. It is more intense and will not soften your icing too much.


DSC_1306-Edit


Whip the Mascarpone cream cheese with the reduced strawberry puree adding icing sugar to meet your preferred sweetness, and when all combined and smooth add the double cream gradually mixing at high speed until you reach a piping consistency.


DSC_1285-Edit


Ingredients :
-1 cup of sugar
-125 g unsalted butter (room temperature)
-2 eggs
-2 tsp Vanilla extract
-1 tsp baking powder
-1 + 1/3 cup flour
-1/3 cup milk
-100 g white chocolate chips
Frosting:
-250 g cream cheese (I like to use Mascarpone)
-pinch of salt
-icing sugar (according to your personal taste)
-strawberry puree
-300 ml double cream
-few drops pink food color (optional)

DSC_1287-Edit

Spring Blossom Cupcakes with Raspberries

DSC_0525

My neighbour has a beautiful Japonica tree in his garden which is hanging over our fence, and this makes me so happy every time I look out the window. It is in full bloom now, and the sight of it made me acknowledge that finally Spring is definitely here! Exciting times ahead as every year when we shift from Winter to Spring, then into Summer. I love this time of year so much, and the kids feel the same.
DSC_0537
So, without any further ado, let me bring you these simple but very delicious Raspberry Cupcakes on the table. There. Enjoy.
You’re welcome.
DSC_0547
Ingredients :
-1 cup sugar
-125 g unsalted butter (room temperature)
-2 eggs
-2 tsp Vanilla extract
-1 tsp baking powder
-1 + 1/3 cup flour
-1/3 cup milk
-250 g fresh raspberries
Frosting:
-125 g unsalted butter (room temperature)
-half tsp Vanilla extract
-4-5 cups icing sugar (according to your personal taste)
-few drops pink food color (depending how light or deep pink you want your icing to be)
DSC_0529
Method:
Preheat your oven to 350 degrees. Line your cupcake tin with paper cases.
In a mixing bowl, cream together the butter and the sugar. Add the eggs and vanilla and mix until you get a smooth and fluffy consistency. Add the dry ingredients and only mix until everything is combined, but please don’t overmix your batter.
Throw in the raspberries, and mix lightly, reaching down with a spatula to coat the fruits, but don’t crush them.
Scoop the batter into your lined cupcake tin, only filling 3/4 of the way up because they will rise. Bake for 20 minutes, then let them cool completely on a wire rack before frosting with the butter cream.
To make the frosting, start with creaming the butter with 1 cup icing sugar, gradually adding the vanilla, pink color and more sugar, until you get your desired icing color and consistency.
You might want to add fresh raspberries to your icing too, in this case make sure you buy more in the first place, and bare in mind that in this case you will need more icing sugar too.
DSC_0541
DSC_0546
DSC_0515


Pistachio and White Chocolate Cupcakes

DSC_9366


A few months ago a friend shared on her social media a recipe of pistachio cream. After I saw that, I was hooked. I translated the recipe, because it was in Italian, and I adapted to my liking and ultimately I made these pistachio cupcakes. They turned out ahhhmaaaazing! These cupcakes are bursting with pistachios, overall I used about 350 grams, and they are heavenly.
I made two kind of frosting for this cupcake (mainly because my kids love different flavors), the pistachio and white chocolate (which is obviously the main star here), and strawberry cream frosting, which is also very delicious. Combined the two together results in a unique flavor. Personally, I preferred the all green cupcakes, but my little girl only wanted the ones with pink frosting, my husband with both, and so on….
DSC_9344
DSC_9342
DSC_9354
Ingredients:
For the cupcakes:
-1 cup unsalted shelled pistachios
– 200 g cake flour
– 3/4 tsp baking powder
– 1/4 tsp baking soda
– 115 g unsalted butter, room temperature
– 200 g granulated sugar (I used white sugar this time)
– 3 egg whites, room temperature
– 2 tsp good quality vanilla extract
– 3/4 tsp good quality almond extract (it really helps bring out the flavor of the pistachios, so it’s essential)
– 120 g full fat sour cream, room temperature
– few drops of green food coloring (optional)
– pinch of salt
DSC_9357
For the pistachio cream:
– 150 g unsalted shelled pistachios
– 300 ml double cream
– 100 g white chocolate ( I always use the best Lindt white chocolate in my recipes)
– 50 g white sugar (you should only add a little at a time and taste it, you may not want to add 50 g, or you might want to add more…)
– 20 g unsalted butter
– 10-50 ml full fat milk (always go for full fat when baking!)
Strawberry frosting:
– 200 g fresh strawberries
– 50 g caster sugar
– 300 ml double cream
DSC_9313
DSC_9352
Method:
Put 1 cup of shelled pistachios in a food processor and grind. Set aside.
Preheat your oven to baking temperature. Line the cupcake pan with the paper cases (yields about 16 cupcakes).
Mix the flour with baking powder, baking soda, salt and most of the ground pistachios together. Leave some crumbs for decorating.
Using an electric mixer, beat the butter and sugar until light and fluffy. Add the egg whites, vanilla extract and almond extract. Beat until well combined, then add the sour cream too, and beat until combined.
Add the dry ingredients now, turning your mixer to the slowest speed, or just mix with a large spoon. It is important that you don’t overmix the batter, only until everything is combined.
Divide the batter into the cupcake liners, filling only 3/4 full. Bake for 18-23 minutes, turn the pan after the first 10 minutes if necessary.
Let them cool completely on a wire rack before frosting.
DSC_9363
Pistachio and white chocolate cream:
Bring a small saucepan of water to boiling on the stove. Add the remaining shelled pistachios to the boiling water and boil for about 10 minutes, but not longer than that. While boiling, prepare a bowl with cold water, adding some ice cubes to it to make it really cold. When the pistachios are done boiling, drain then throw them in the ice-cold water for a few minutes. Drain them again before starting peeling off the brown skin. Doing this, the pistachios will come out very easy from their skin, leaving a bright green pistachio only. After pealing all the pistachios, put them in a food processor, and finely chop them.
Melt the white chocolate in a small pan together with the butter.
Combine the finely chopped pistachios with the melted white chocolate and sugar in the saucepan and stir everything until you get a thick consistency. If it is too thick, add a little milk.  You can taste it now, but bare in mind that it tastes so good, you could just eat it right there right as it is…..Let it cool completely.
When you are ready to frost your cupcakes, place the pistachio cream in a mixing bowl, and start beating, adding only a little double cream at a time. When it starts to thicken add some more double cream, and keep on like this until you used all the double cream. The final consistency of your pistachio cream should be of piping thickness, meaning not runny, and not as thick as butter, but somewhere in between.
Strawberry cream frosting:
Chop the fresh strawberries in the food processor adding the sugar. Whip 300 ml double cream slowly adding the chopped strawberries spoon by spoon.
DSC_9359

Valentine’s Day Cupcakes


DSC_2712


Red hearts, chocolate hearts, roses and raspberries. These would be the keywords to describe my Valentines Cupcakes I made this weekend. So light, so creamy, so dreamy….. I only made a few though, and apparently not enough, because the family was demanding for more.

M y little daughter helped me making the red roses from sugar paste, she made one just by herself after watching me closely. Like mother like daughter! She definitely takes after me, but to be fair, my older daughter loves crafting just the same.
DSC_2719
To make these beauties, I baked feather-light raspberry cupcakes and frosted with cream cheese icing. Really, really yummy! I wanted my cake to be red-and-white, like really popping red and bright white, but I just learned a lesson, which I kinda knew already, that you can not bake WHITE cake. Not in a natural way, anyway. I put white sugar instead of brown (and if you know me, you know that I use brown sugar like 99% of the time), and I put white food color in the batter (like a lot), and I baked on very low heat, and for a shorter amount of time, and my cake were still not white enough. And they never will be, I will just have to except it. I used some white food color in the icing too, and that actually worked, so at least the topping was nice and bright white.
DSC_2714


Ingredients:
125 gr unsalted butter, room temperature
1 cup white caster sugar
1+1/3 cup flour
1/3 cup whole milk
2 eggs, room temperature
1 tsp baking powder
1 tsp vanilla extract
300 gr fresh raspberries
pinch of salt
For the icing:
250 gr Mascarpone cream cheese
300 ml double cream
powder sugar, depending on your personal taste (I only used 1/2 cup)
white food color, optional
Method:
Preheat your oven. In a bowl, mix the flour with the salt and baking powder. Divide the baking cases in the baking pan.
In a larger bowl, cream together the butter and the caster sugar until light and fluffy. Add the eggs and the vanilla, mix well, then add in the flour mixture and the milk. Mix on low speed only until everything is incorporated. Throw in the raspberries and fold using only a large spoon. I didn’t want to crush the raspberries, so I mixed it very gently and only for few seconds.
Divide the batter evenly in the cupcake pan using an ice cream scoop only 3/4 way. Bake for about 18-20 minutes, then remove from the oven and let them cool a little before you transfer the cupcakes to cool completely on a wire rack.
In a bowl, cream the cream cheese with the powder sugar gradually adding the double cream too. If you have more raspberries, you can add some to the icing, it will make it pink and will taste very good!
P.S..I am very excited to announce that now I have my own App  which you can find on Play Store under the name Beautiful Cakes on your phone. I would appreciate any comments on this, weather you could find it easy or not and of course what do you think about it. I will probably come back to this post and edit this section should I have to change anything in the App (…well, that would be my husband, he designed the app and made it work…). Thank you!
Here’s the link:
DSC_2727

Ombre Violet Cake with Wild Blueberry Buttercream for Mothers Day

DSC_9656

DSC_9665


Violet or purple? Purple or violet???  I had to look up to see the difference in definition, but couldn’t say that I know better. I think the colour of my cake is violet though, as seems that purple is more red-ish, so I go for violet, but correct me if I’m wrong.


DSC_9673


I made this tiny cake using violet food colour. I baked the three layers separately, and tinted the batter in different proportions to get the ombre effect. First, I thought that the darker shade would be too dark, it looked more black at some point, and only when I cut into it I started to relax seeing the nice, deep violet colour, and it was not black.


DSC_9669


The cake is not a sponge cake, is my yummy vanilla cake recipe with French butter and vanilla extract, only this time I used white sugar instead of brown, because I wanted to have a light coloured batter which can be tinted to the desired colour.


DSC_9670

I made buttercream this time, which is also not my usual cake filling, but I wanted different. I mixed Wild Blueberry jam in my buttercream to add flavour, but I applied a layer of jam on top of each cake layer, too -which, Hello! -it really isn’t my style of making cake, but as I said, I wanted different 🙂


DSC_9679


DSC_9658


DSC_9661


DSC_9663


DSC_9664

Blueberries and White Chocolate Chips Cupcakes with Pink Meringue Kisses

dsc_9583


My daughter and her friend baked blueberry-chocolate chips muffins on Thursday, and I put aside a few. They took care of the rest, meaning they decorated them and eat most of them. They did a very good job, and the muffins were delicious. The best part of all was that they genuinely had lots of fun in the kitchen!


dsc_9592

I had two egg whites in the fridge from the previous day so I thought I will use them to make meringue kisses. I don’t remember ever making them before, and there sure is room for improvement. They cracked, and I need to be more careful next time, although I’m not sure why it happened. But, they look adorable nonetheless, and tasted wonderful, so it’s not all that bad after all.
dsc_9596
dsc_9585
Ingredients:
-125 g butter, softened at room temperature
-1 cup brown sugar
-2 eggs
-1+1/3 cup flour
-1/3 cup milk
-2 teaspoon vanilla extract
-pinch of salt
-2 teaspoon baking powder
–100 g white chocolate chips
-200 g fresh blueberries
Frosting:
-300 ml whipped double cream
-2 egg whites
-150 g white caster sugar
-pink food colour
Method:
Preheat the oven. Line your cupcake pan with the cases.
In a bowl, use an electric mixer on high speed to cream the butter and sugar together until it’s light and fluffy. Add the eggs and mix well.
Add the vanilla, flour and milk, and beat with the electric mixer until combined, but be careful do not over-mix, because it will become dry and sort of a bread.
Add the chocolate chips and blueberries and stir until it’s all incorporated.
Use an ice cream scoop and divide the mixture evenly in your cupcake cases,  fill them only 3/4.
Bake them for around 20 minutes, half way through you can turn your tray in the oven, but don’t open the oven in the first 10 minutes of baking, this is important!
Take them out from the oven, and you can leave the cupcakes in the pan for about 5 minutes before you transfer them on a wire rack.
Whip the egg whites adding the sugar above a pan of hot boiling water. This way the sugar will dissolve quickly and you get a shiny, smooth mixture. Transfer into a piping bag, cut the end (about the size of a 5 pence) then pipe the egg cream on a roasting pan lined with baking paper. Bake until it’s dry and comes off easily from the paper.
dsc_9577
dsc_9598
dsc_9600
dsc_9561
dsc_9563
dsc_9567

Blackberry & Lemon Cake


dsc_7929

Is that time of the year again, when the blackberry bushes are in full bloom, and we pick a handful every time we step out the house, just like we do every season.
I choose to bake a plain sponge cake and fill it with blackberry cream this time. The lemons came into the picture in form of lemon syrup which I drizzled generously on top of each cake layer, and also used in the frosting. Funny how a blackberry cake turned out to be pink, but there’s no secret to it, the magic was to simmer/boil the fresh blackberries with lemon juice for a few minutes and they turned from black to beautiful red.
dsc_7945
dsc_7944
When I finished this cake and my son first tasted it, he pulled all sorts of faces to me, then pushing his plate away he said “Mom, this is the most disgusting cake I ever had!” Pff…..that bold honesty put me off a little bit, and when tasting it myself I almost fell for it, but after leaving an almost untouched, full cake in the fridge over the night (which never happened before in this kitchen), the next morning our disappointment turned into amazement and now I can say that this is the kind of cake which is best to leave to rest and chill in the fridge for at least 6-8 hours before eating (must be the cream cheese!). Surprisingly the next morning this cake was wonderful, the flavours of the lemon and sweet blackberry combined and even my son’s face lit up with happiness and he finally had a slice of cake that he could enjoy.
dsc_7925
Ingredients
Sponge cake:
-6 eggs at room temperature, separated
-6 Tbsp granulated sugar
-6 Tbsp all purpose flour
-1 tsp baking powder
-1 tsp vanilla extract
-pinch of salt
Lemon syrup:
-3/4 cup water
-1 Tbsp granulated sugar
-4 Tbsp fresh lemon juice (about 1-2 smaller lemons)
Blackberry cream:
-3 cups powdered sugar
-375 g butter at room temperature
-1 pack Mascarpone cream cheese
-300 g fresh blackberries (but take away 1 cup to place them between the cake layers)
-2 Tbsp fresh lemon juice (1 lemon)
-1/2 tsp salt
dsc_7937
Method:
Preheat the oven. Line the bottoms of two 8″ cake pans with baking paper, no need to grease.
In the bowl of the electric mixer fitted with whisk attachment, beat the egg whites with the sugar until you get a firm, shiny peak. Now gradually add the egg yolks, one at a time and the vanilla extract.
Mix the flour, salt and baking powder. Add the flour mix to the egg cream, but very gently and using only a large spoon until everything is combined. Evenly divide the batter into the cake pans and bake for 25-30 minutes.
Remove from the pans by sliding a thin spatula or knife around the edges then transfer to a wire rack, remove baking paper from the bottom. Let it cool completely, then cut both  cakes in two equal layers.
Blackberry cream:
Put 1 cup of blackberries with 2 Tbsp fresh lemon juice in a small saucepan. Simmer for a few minutes until they go red and soft. Strain through a fine mesh strainer, pushing the blackberries through with a wooden spoon until only seeds are left in the strainer. Discard seeds, and put the gained puree aside to cool down completely. There should be about 5 Tbsp puree.
In a bowl of the electric stand mixer fitted with whisk attachment, start whipping the butter slowly with the powder sugar and salt (this is the part I hate because I just can’t do it without my kitchen ending up all dusty….). Increase speed to high and beat until white and fluffy.
Add the cream cheese, a Tbsp at a time and mix until well combined, then whipping 2-3 more minutes until fluffy again, scrapping down the bowl as needed.
Drizzle in the cooled blackberry syrup 1 Tbsp at a time then beat another minute. If you think it’s getting too soft or started to curl, then add more powder sugar and 1 Tbsp of butter.
Make the lemon syrup by combining the lemon juice with the sugar and water in a saucepan on the stove. When it gets hot and started to simmer, take it off and start drizzling the syrup directly on the cake layers. Let it cool for a few minutes before filling your cake with the cream.
After each addition of blackberry cream, put a few blackberries before stacking with another layer of cake. Finish off with generous amount of ream to the sides and lighter layer of ream on the top. I made few rosettes (which by the way are far from perfect, but just can’t seem to master this technique….. 🙂 )
dsc_7926